

In Brief: How To Clean Your Snow Blower Carburetor
To clean your snow blower carburetor, ensure that it is off and cool. Remove the muffler and gas tank, then the carburetor. Drain the fuel by removing the bowl, place aside any rubber components, then submerge everything else in a cleaning solution. Scrub the nuts and bowl, clear debris with compressed air, then reassemble and refit.
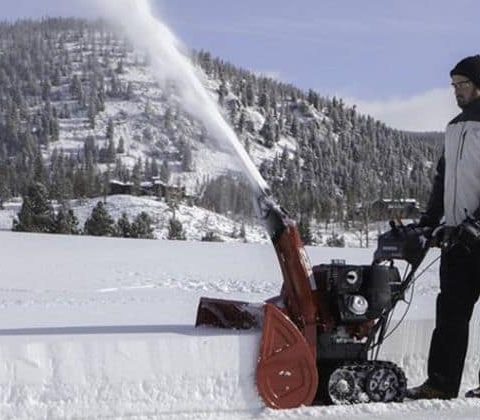
While you could hire a professional to do it, with a bit of time and effort you can save some money by doing it yourself.
We have put together this step-by-step guide to show you how to clean your snowblower carburetor.
How To Clean Your Snow Blower Carburetor
We have put together this step-by-step guide to show you how to clean your snow blower carburetor. You will also need your owner’s manual. If you have lost it, you will be able to find a digital copy online. Check the manufacturer’s website. Use the camera to document everything you do so that you can ensure you put everything back as it should be.
Materials
- Some carburetor cleaning solution.
- A wire brush, scouring pad, or similar.
- A can of compressed air.
- A pan for catching fuel.
- A camera for documentation.
- A copper wire.
Tools
- A socket wrench.
Instructions
- Step 1: Switch Off
Before starting, ensure that you have switched off the snow blower and allowed the engine to cool. - Step 2: Access The Carburetor
How you gain access to the carburetor depends on the make and model of your snow blower. Refer to the owner’s manual for instructions.
Generally, you will need to remove the muffler and fuel tank. Disconnect the fuel hose and place it in a pan for catching fuel. - Step 3: Remove The Carburetor
At this point, decide if you need to remove the carburetor.
If it is moderately dirty, you can leave it in place and perform the rest of the steps. If it appears very dirty, or you want to be sure to thoroughly clean it, remove it from the snow blower.
Again, refer to the owner’s manual if the removal method is not obvious. - Step 4: Remove Bowls
Grab the fuel pan and place it under the carburetor. Locate the nuts on the base of the bowl and remove them.
Fuel will drain from the carburetor. Wait for all the fuel to drip out. - Step 5: Submerge In Carburetor Cleaner
Once the fuel has drained, remove any rubber rings from any parts that you have removed and put them aside.
Take everything else, including the bowl and the carburetor itself, and submerge them in the carburetor cleaning solution.
You must leave it to soak for at least an hour, but some people recommend allowing a few days for the cleaning solution to fully dissolve the grime. - Step 6: Scrub Nuts
Remove everything from the cleaning solution and inspect all the nuts and the bowl.
If you see any rust, take the wire brush and scrub it away. - Step 7: Clear Remaining Debris
Using your can of compressed air and your copper wire, go around all the holes and openings on the carburetor and ensure that all the debris has been removed.
Run the wire through and work any remaining debris loose. Use the compressed air to blow it out. - Step 8: Reassemble Carburetor
If you are satisfied that the carburetor is clean, you can now reassemble it. Reattach the bowl using the nuts, remembering to replace the rubber seals and o-rings that you removed and set aside.
Now would be a good time to look through the photos you took for documentation to ensure you are putting everything back as it should be. - Step 9: Refit Carburetor
Reattach the carburetor from where you removed it, reattach the fuel hose, then reattach the muffler and gas tank.
Make sure that everything appears the same as in the photos you took at the beginning of the process. Your carburetor is now clean and ready for use.
Summary
We hope that this guide has helped you to clean your snow blower carburetor.
Carburetor problems are the usual cause of snow blower engine problems, so ensuring that yours remain in good working condition should keep your snow blower functional for many winters to come.
If you have any questions or comments about this guide or snow blower maintenance in general, please feel free to leave them in the comments section below.